CHALKBOARD CLIPBOARDS!
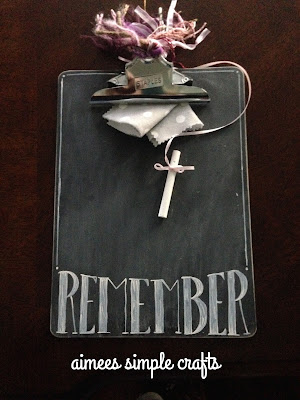
While perusing Pinterest awhile ago, I saw a chalkboard clipboard that I loved. It had "REMEMBER" painted on it and I thought that would look really cool on a wall so that stuff could be written on it. After thinking about it a bit, I thought perhaps the writing should be at the bottom rather than under the clip, like the original, so that if you clipped something to it, the writing could still be seen.
As the end of the school year came to a close, we needed going away gifts for some of our staff. I thought that these would be great gifts. I made a few and we clipped gift cards to the top.
I had a few clipboards left over and thought they'd look good on an empty wall in my family room - they would fill the space until I had enough money to get some favorite paintings framed (which will be awhile because that's a big budget thing!).
Here is the original idea - I added decorative fibers to the top of the clip.
Here are the ones I did for our wall:
I painted them with two coats of chalkboard paint (NOT spray paint). Use sandpaper to distress the edges when the paint is dry.
I then used craft paint to do the lettering using the same process I do for chalkboards (directions on the Craft Project Instructions page).
Add a few lines or dots on the edges (or not) and then rub chalk across the board and wipe with a soft flannel cloth.
I thought it would be fun to switch out pictures and write things we need to remember.
Just think of all the different clipboards that would be useful: Grocery List, Honey Do List, Receipts... the ideas are endless!!


Comments
Post a Comment
Please feel free to comment - I would love to hear from you!