Gifty Jars
Update:
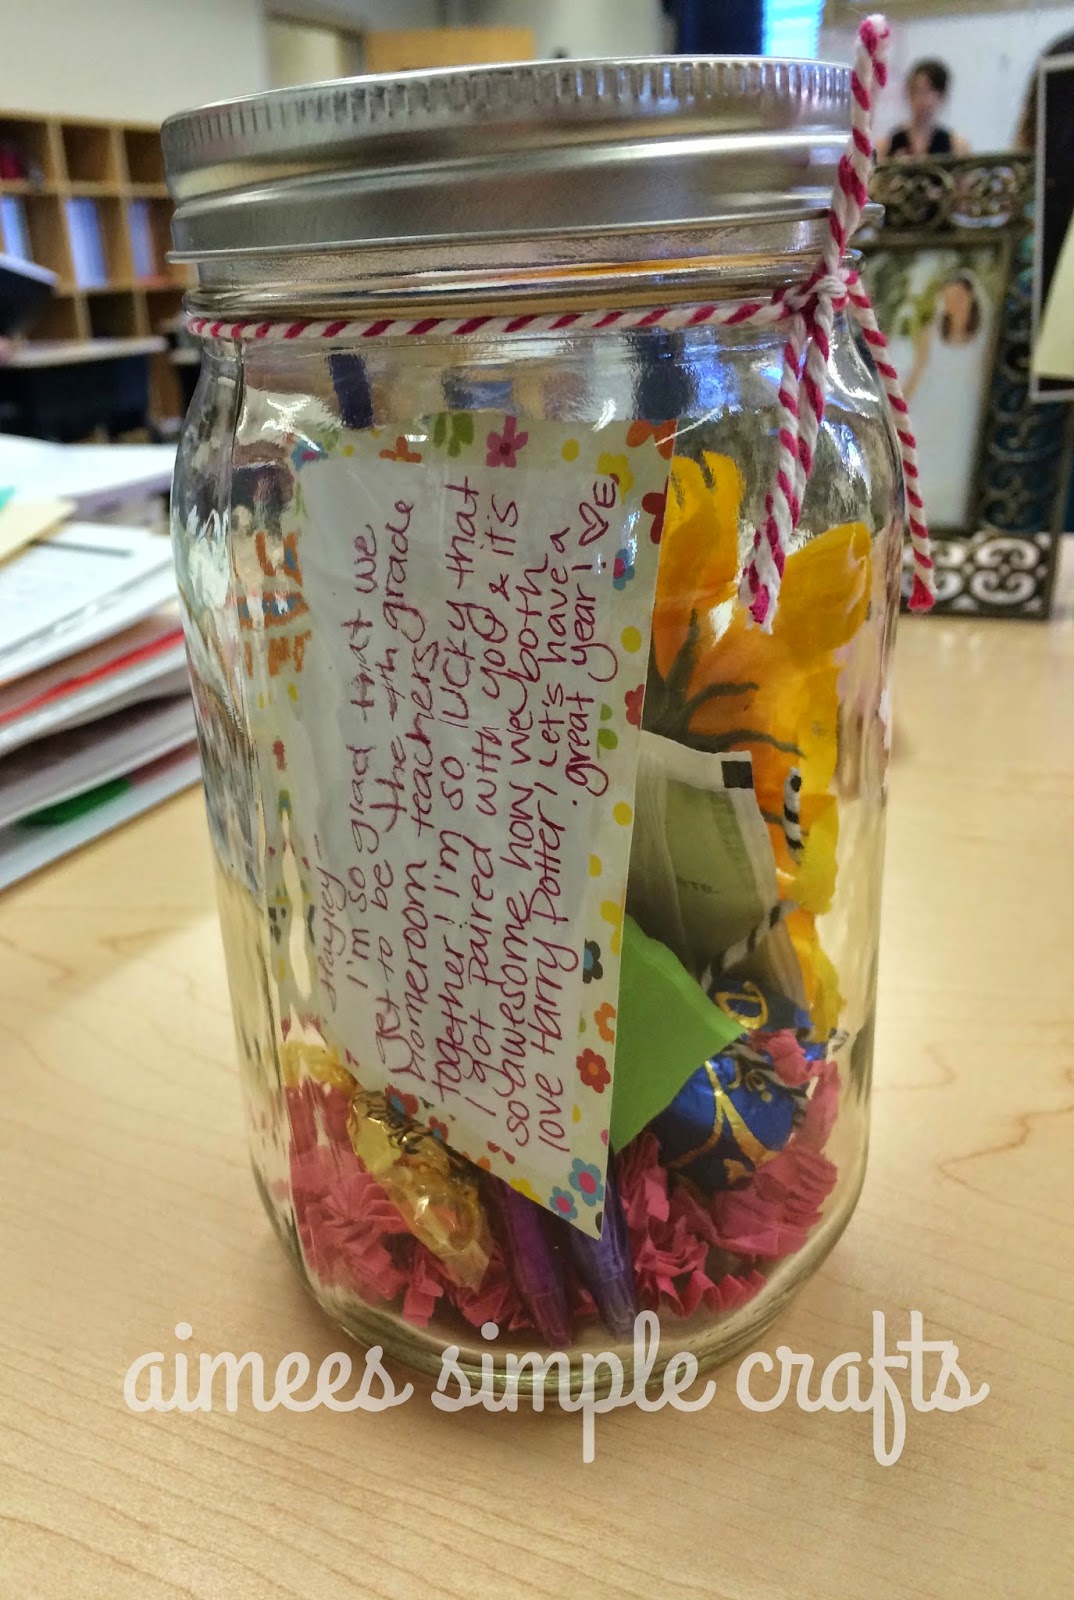
My daughter put together some thank you gifts for her colleagues at the school where she teaches. She wrote a personal message to each one and added that to the jar. She put in items such as tea bags, pens and candy. They were very touched by the thoughtful gift! She used scrapbook paper for the lids and the notes.

During the summer, as the counselors and admin tried to prepare for the beginning of school, there were lots of changes that made it a bit stressful. The 13 or so administrative changes within the district created a domino effect that rippled through most of the schools. We had a few admin changes at my high school, but also some teacher changes as well.
Change is usually pretty benign - we all go through it pretty much unscathed, but this year was a bit different. I likened it to being hit by a wave - just as you get your head above water, another one rolls through. We all pulled together and finished everything we needed to get done and were ready for those kids to arrive on the first day. But it wasn't easy - a lot of extra time was spent by many people behind the scenes to make everything fit together. But that's the ultimate goal - to make it look like it was no sweat!
I was looking for a way to say thank you to those folks. Cupcakes came to mind, but we've all been (stress) eating way too much lately! So, a browse through Pinterest gave me the idea for a canning jar thank you.


I started out with quart size jars. These are big enough to hold pretty much anything. The one on Pinterest held some markers and other office supplies. A dozen of these are about $10 at Walmart. At Michael's, they're a lot more expensive.

I bought little packages of Oreos and York Peppermint Patties. I bought some silk flowers and found some cute pens and some little labels at Michael's.


I used MS Word to draw a 2 1/2" circle. I "filled" it with black and used a chalkboard font in white to do the lettering inside the circle. When cut out, these fit perfectly in the top of the lid (no glue necessary). I also used a stencil to cut out two hearts for each jar. These would go on the ends of the twine bow.


Next, is the fun part. Fill the jar and put on the lid! Take twine and wrap it twice around the lid, tie a bow. Punch small holes in the hearts, slip each end of the twine through the holes and make a knot. Done! Wouldn't these make cute Halloween gifts? Christmas gifts? What fun!!
P.S. If you haven't done this yet, go to the 99 cent store and buy a sugar jar. Put your twine in the jar and run the end out the hole in the lid. Makes using twine so much easier!

My daughter put together some thank you gifts for her colleagues at the school where she teaches. She wrote a personal message to each one and added that to the jar. She put in items such as tea bags, pens and candy. They were very touched by the thoughtful gift! She used scrapbook paper for the lids and the notes.
During the summer, as the counselors and admin tried to prepare for the beginning of school, there were lots of changes that made it a bit stressful. The 13 or so administrative changes within the district created a domino effect that rippled through most of the schools. We had a few admin changes at my high school, but also some teacher changes as well.
Change is usually pretty benign - we all go through it pretty much unscathed, but this year was a bit different. I likened it to being hit by a wave - just as you get your head above water, another one rolls through. We all pulled together and finished everything we needed to get done and were ready for those kids to arrive on the first day. But it wasn't easy - a lot of extra time was spent by many people behind the scenes to make everything fit together. But that's the ultimate goal - to make it look like it was no sweat!
I was looking for a way to say thank you to those folks. Cupcakes came to mind, but we've all been (stress) eating way too much lately! So, a browse through Pinterest gave me the idea for a canning jar thank you.
I bought little packages of Oreos and York Peppermint Patties. I bought some silk flowers and found some cute pens and some little labels at Michael's.
I used MS Word to draw a 2 1/2" circle. I "filled" it with black and used a chalkboard font in white to do the lettering inside the circle. When cut out, these fit perfectly in the top of the lid (no glue necessary). I also used a stencil to cut out two hearts for each jar. These would go on the ends of the twine bow.
Next, is the fun part. Fill the jar and put on the lid! Take twine and wrap it twice around the lid, tie a bow. Punch small holes in the hearts, slip each end of the twine through the holes and make a knot. Done! Wouldn't these make cute Halloween gifts? Christmas gifts? What fun!!
P.S. If you haven't done this yet, go to the 99 cent store and buy a sugar jar. Put your twine in the jar and run the end out the hole in the lid. Makes using twine so much easier!


Comments
Post a Comment
Please feel free to comment - I would love to hear from you!