CAKE BATTER OREO COOKIES
Sometimes I just can't help myself. When I go on Facebook and I see a post of something yummy, that looks pretty, AND I have all the ingredients in my cupboard, I just have to give it a try. This was the case with these cookies.
The post from iambaker.net appeared in my news feed. A recipe from Sally's Baking Addiction had been shared via I am baker. (Here's where my addiction kicks in - I jump from one blog to another and start bookmarking and it just never ends... sigh.) This blog as well as the cookies were eye-catching!

In addition to the usual cookie ingredients, this recipe calls for vanilla cake mix (to replace some of the flour), sprinkles and crushed Oreos. Heaven!! I added in bitter sweet chocolate chips on the top. By the way, I never could figure out how people (specifically blog-type people) get these perfect looking chocolate chip cookies with fully formed chips on top. My chips were always mushed in with the dough. Well, here's the secret if you didn't already know (I'm guessing most people DO know this, I'm just behind the curve) - when you pull the cookies from the oven, press chips into the top! Who knew? (Obviously I didn't because this information thrilled me!)
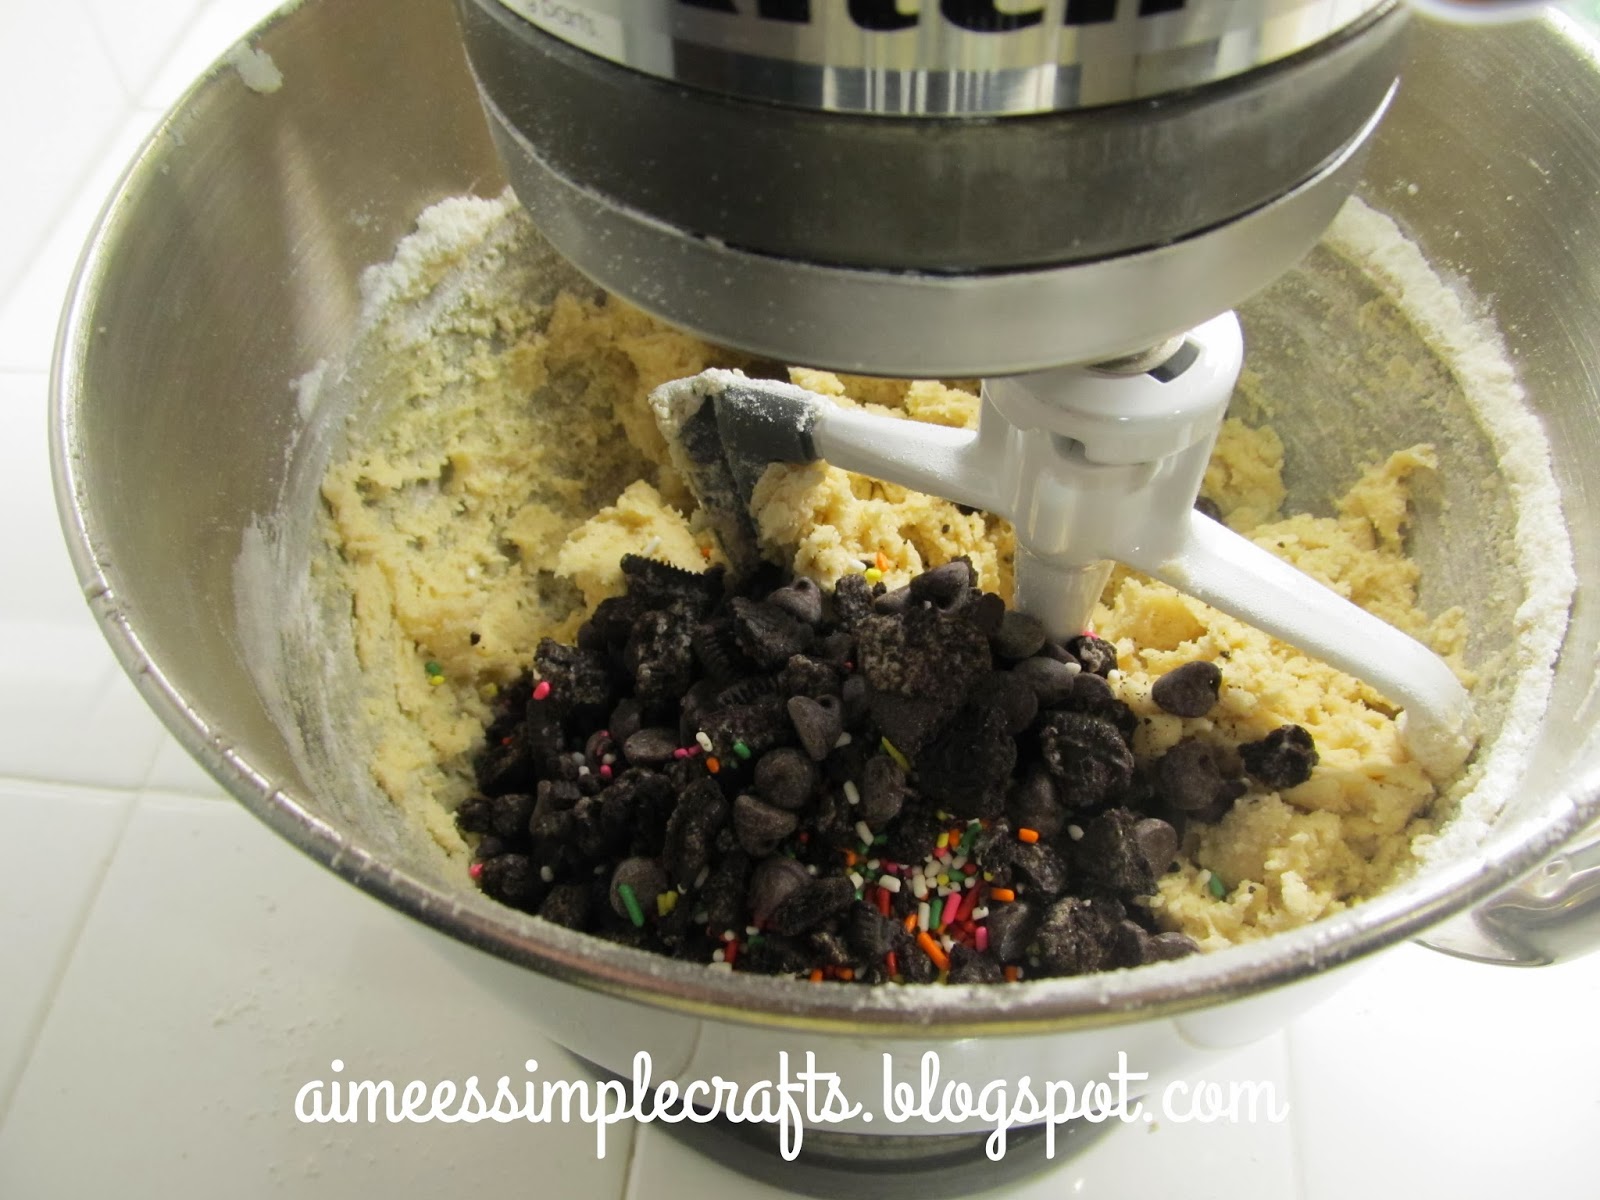
This recipe makes about two dozen good sized cookies. The Oreos, chips and sprinkles are added into the dough and make a pretty amazing sight! I was at a bit of a loss as to how to break up the cookies. I went on the internet and read through suggestions - it ranged from using a food processor, blender, mallet, hammer.... sounded like some large scale construction project! People complained about pieces ending up like chocolate dust or baggies breaking when pounding with a hammer. My husband's affinity for saving weird things provided me with the solution. I used our little kitchen hammer and a cereal bag, you know the ones that line the box? Perfect!! Tough enough to withstand some serious hammering! And, the white frosting center of the cookies didn't stick much, so most of it ended up in the dough.

Another part of the recipe taught me something new - when you shape your cookies, make them taller than wide. They will then spread out but have a lot of density in the center. Looks weird, but it works! Also, don't ignore the recipe when it says REFRIGERATE the dough and to cool for 4 minutes and then transfer to a wire rack. Also, I read somewhere to only use cooled cookie sheets - don't cook right away on the sheet you just took out of the oven.
I formed my "tall" cookies and pressed them so that the bottoms were flat. I then covered them as directed and put them in the fridge until I was ready to bake them. This picture shows them on their sides.

The post from iambaker.net appeared in my news feed. A recipe from Sally's Baking Addiction had been shared via I am baker. (Here's where my addiction kicks in - I jump from one blog to another and start bookmarking and it just never ends... sigh.) This blog as well as the cookies were eye-catching!
In addition to the usual cookie ingredients, this recipe calls for vanilla cake mix (to replace some of the flour), sprinkles and crushed Oreos. Heaven!! I added in bitter sweet chocolate chips on the top. By the way, I never could figure out how people (specifically blog-type people) get these perfect looking chocolate chip cookies with fully formed chips on top. My chips were always mushed in with the dough. Well, here's the secret if you didn't already know (I'm guessing most people DO know this, I'm just behind the curve) - when you pull the cookies from the oven, press chips into the top! Who knew? (Obviously I didn't because this information thrilled me!)
This recipe makes about two dozen good sized cookies. The Oreos, chips and sprinkles are added into the dough and make a pretty amazing sight! I was at a bit of a loss as to how to break up the cookies. I went on the internet and read through suggestions - it ranged from using a food processor, blender, mallet, hammer.... sounded like some large scale construction project! People complained about pieces ending up like chocolate dust or baggies breaking when pounding with a hammer. My husband's affinity for saving weird things provided me with the solution. I used our little kitchen hammer and a cereal bag, you know the ones that line the box? Perfect!! Tough enough to withstand some serious hammering! And, the white frosting center of the cookies didn't stick much, so most of it ended up in the dough.
Another part of the recipe taught me something new - when you shape your cookies, make them taller than wide. They will then spread out but have a lot of density in the center. Looks weird, but it works! Also, don't ignore the recipe when it says REFRIGERATE the dough and to cool for 4 minutes and then transfer to a wire rack. Also, I read somewhere to only use cooled cookie sheets - don't cook right away on the sheet you just took out of the oven.
 |
I formed my "tall" cookies and pressed them so that the bottoms were flat. I then covered them as directed and put them in the fridge until I was ready to bake them. This picture shows them on their sides.
You can find the recipe here.
I really think you'll like these! I'm already imagining these cookies at Christmas......


Comments
Post a Comment
Please feel free to comment - I would love to hear from you!